Hello there,
A few weeks ago I shared these adorable embroidery hoop ornaments I found on Pinterest in my Facebook group.

Unfortunately I couldn't find any instructions or a source, but there was a lot of interest in how to make one. So I experimented a bit and this blog post is the result :). Here is the one that I ended up making:

These are the supplies I used to make the snowman design above, but you will have to alter your colors choices if you choose to make something different, of course!
To start you will need the following supplies:

- a small embroidery hoop ( wood looks much nicer than plastic, I think!)
- scissors
- small pieces of prefused fabric in colors that you want for your design ( I used white for the snow and snowman, dark blue for the scarf, and green for the trees)
- a neutral piece of background fabric, larger than your hoop ( I used a light tan, but blue or black would make the snow pop more!)
- a pen, pencil, or water soluble marker
- a piece of felt or wool for the backing, slightly larger than your embroidery hoop
- glue or gluegun
- sewing machine outfitted with black thread
- handsewing needle and embroidery thread
{my blog post contains affiliate links, where I may receive a small commision if you choose to buy something~ there is NO extra cost to you!}

To begin, you need to trace the OUTSIDE of your hoop onto your background fabric. This will serve as your guide as you design your ornament. You do not want to place design elements outside of your circle!

Cut out your "snow" and now make some trees and a blobby snowman body in the same manner. For the scarf you can simply cut three thin rectangles and overlap them slightly onto the snowman's neck.
Arrange everything within your circle and fuse everything down.


JUST A NOTE: I cut mine exactly on the drawn edge and that made placement in the hoop a little tricky. I therefore recommend that you cut just a smidge outside of the drawn line!

Now it is time to head to your sewing machine! Insert black thread and freehand stitch around your shapes several times. For the snowhill you can just do the upper edge because the rest will hide in the hoop.

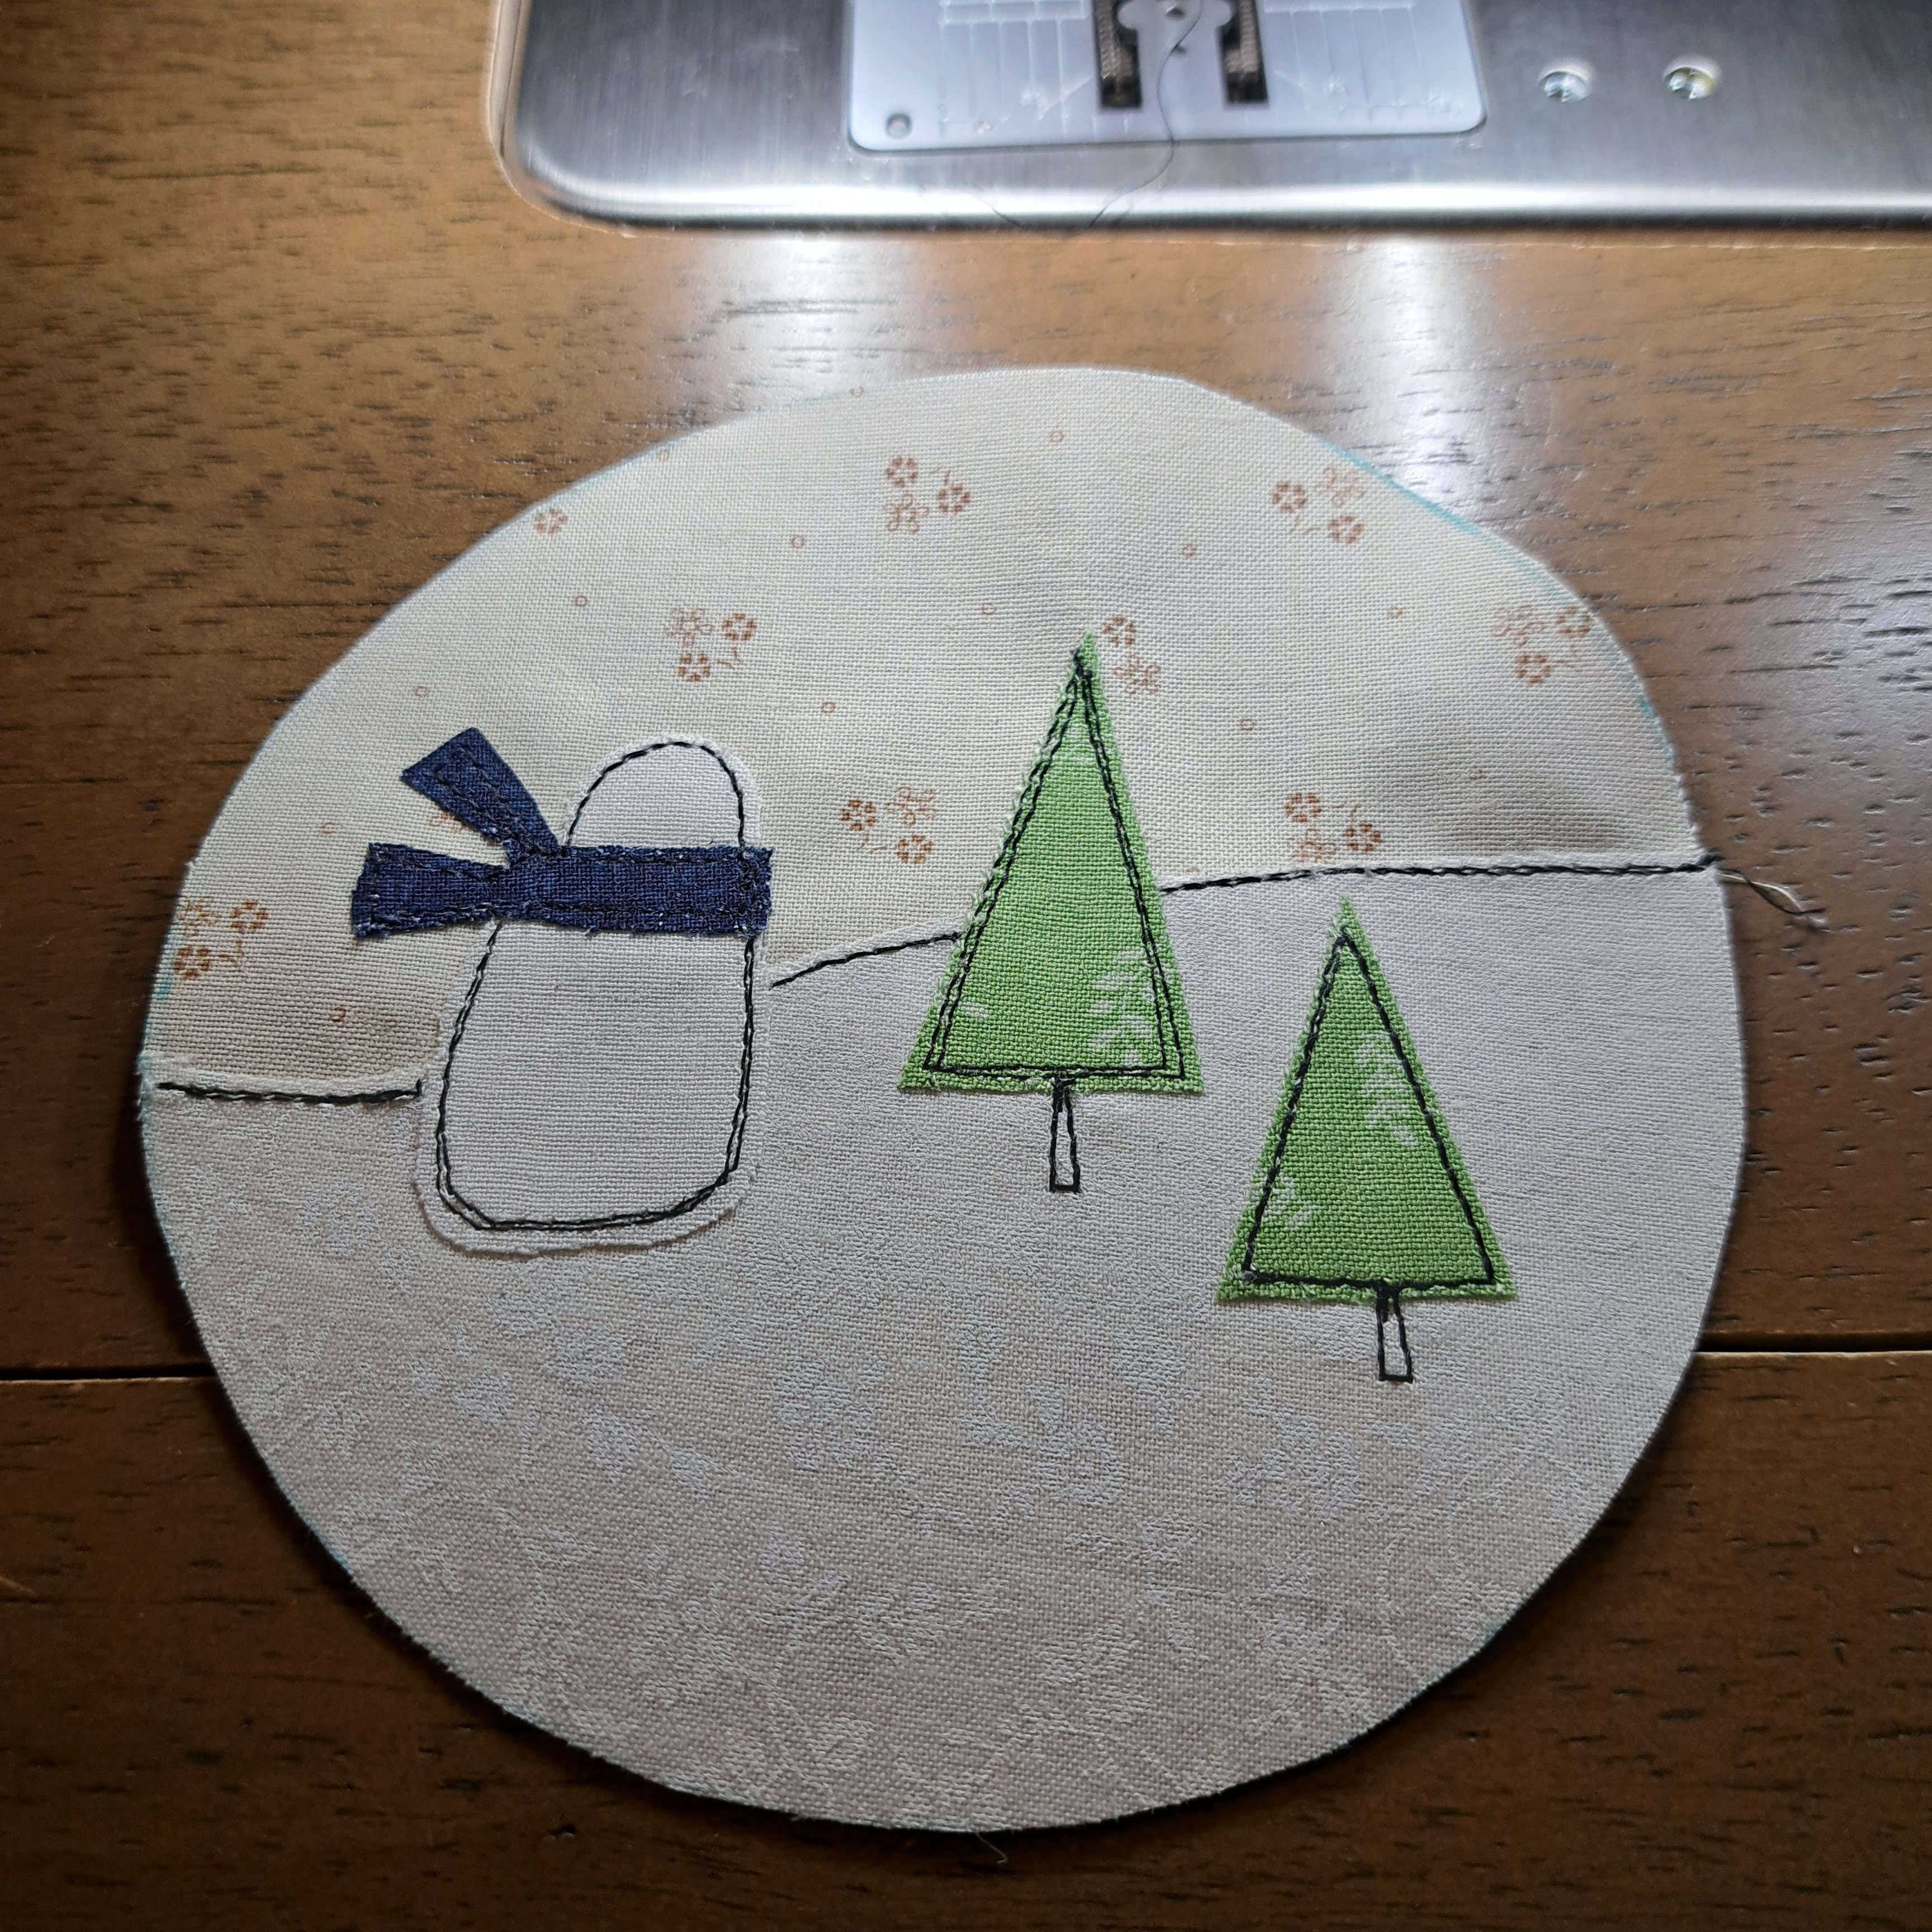
There is no need to be precise! I think it looks way more charming to have your lines slightly offset, but you can ofcourse decide what you prefer. Notice that I also added some trunks to the trees.
Now it is time to place your piece in your hoop. Take your hoop apart for this part.


then slide your inner hoop into the center. If your fabric is not centered, try again. This might take a few tries to get perfect!


With embroidery thread ( my favorite brand is this one ( click) add a nose, some eyes, and snowflakes.I used very simple stitches for these.


For the finishing touch you will want to trace your outer hoop onto a piece of stiff wool or felt. Cut it out and glue it to the back of your hoop with a hot glue gun or fabric glue. Now is the time to add a little loop for hanging as well. I simply attached some twine in between the hoop mechanics. Add a small ribbon and some greenery to cover over the metal parts and voila! Your little piece of art is finished!

You can of course choose to make any design you wish! I'm thinking a church would be pretty, or a little snow hare, or how about some presents? You can just draw something up ( really, it doesn't need to be perfect!) or you can Google "line drawings of..." and you will find lots of options. And you can of course also choose whatever size hoop you have on hand. I think a grouping of different sized hoops would be adorable!
I do hope my instructions make sense, but if not, send me an email or leave a comment and ask away. I am here to help!
Have fun and until next time~happy creating!
Monique
So cute Monique! You always come up with the most adorable projects. Thanks for always giving us great ideas
ReplyDeleteAww, thanks for the nice compliment, Candy, but this was an idea that I found on Pinterest ;)
DeleteAbsolutely adorable!
ReplyDeleteThanks Tierney!
Delete