a blog about my quilting life...mostly

a blog about my quilting life...mostly
Showing posts with label Winterberries. Show all posts

Wednesday, February 24, 2021

Winterberries part 5 ( February 24, 2021)

 Hello, hello!

Time for part 5 of our Winterberries sewalong!

This week is super easy....we are cutting our background and layering and quilting our quilt!

Start by giving your quilt top a good pressing ( because if you are anything like me, it might have been draped over other projects and is a bit wrinkly!) 


You might have some little "dog ears" sticking out from your quilt top, from the setting triangles we used in our top. You can choose to trim those off now, OR you can wait until you are finished quilting and trim them off at the same time you are trimming your backing and batting even with your quilt top...guess which one I'm doing? 


Your quilt top should measure around 39 inches square so you will need a background and batting square that is slightly larger than that. Luckily our fabric comes in 42-44 inch widths so that is wide enough, but you will need a slightly larger than 1 yard piece to cover the length ( 1 1/8 yard should be plenty) . You can choose to piece this, or, of you are lucky, you have a larger than 1 yard piece of fabric that you can trim to size.

I often see recommendations that you cut your batting and backing with a much larger margin than your quilt top, but I find that to be a big waste! I have never run into a problem having those pieces just 2 inches larger , and that leaves me with more fabric and batting for other projects!

Before you start layering your quilt pieces, think about how you are going to quilt your quilt! If you choose to meander quilt by machine, you are good to go. However, if you choose to hand quilt, or even quilt a particular pattern with your machine, you might want to mark your quilt BEFORE layering it, simply because it will be easier.

I am choosing to hand quilt my quilt with a BIG stitch. I love the look, and I love the process so that is my personal preference. You must choose what suits you best. But if you have never tried hand quilting with a big stitch, I highly recommend it ;). If you can't imagine quilting an entire quilt by hand, you can also opt to machine stitch in the ditch on your pieced blocks, and then hand quilt just in the appliqued blocks. Your quilt, your decision! 

Sometimes coming up with the quilting design is the most difficult part! You can choose to quilt straight lines, cross-hatching, circles, shapes,  swirls....whatever you feel looks right! To get these designs you can use stencils ( store bought), your quilt rulers, cookie cutters, cups or plates from your kitchen....you get the idea. The only tricky thing is to line up your quilting so that it is centered on your quilt top and your blocks. Therefore, I start in the middle of my quilt and work my way outwards to the corners. Do pay attention  and make sure that your quilt design works with the quilt recommendations provided on your batting package...some allow you to  quilt up to 10 inches apart, and others only 5, so do follow the guidelines! 


For my quilt, I decided to take my cue from my pieced blocks and simply continued the seam line to mark a quilting line into the setting triangles.  

For my appliqued blocks I didn't want to quilt across my berries and stems, so used a machine quilting ruler and circle template to mark a design around the entire applique. One nice thing about using a water soluble marker is that you can use a wet Qtip to "erase" mistakes or unwanted designs. 


I am providing some closeups so you can see what I used as reference points to get all my lines marked:


Once you have marked your quilt top you will layer it with the backing and batting and baste it. You can baste with basting spray, with safety pins, or with good old needle and thread, using a GIANT stitch.  I prefer the latter for hand quilting because I find basting spray both expensive and messy, and pins can get in the way when you use a hoop. And if you happen to have some old thread, or ugly color thread, this is a great way to use it up!

Once you are all basted you are set to start quilting. Quilting from the middle out has always worked well for me.  If you choose to do BIG stitch quilting I am going to recommend using a thread that you can actually see. My favorite hand quilting thread is 12 wt cotton petite from Sulky ( click), but this time around I decided to use perle cotton that I found at my local reuse store because the color is perfect for my quilt top. I use embroidery needles because the eye is nice and big and is easily threaded. 

So to sum up what you need this week:

  • batting and backing approximately 42 inches wide and tall
  • safety pins or basting thread or basting spray
  • sewing machine and thread for quilting OR hand quilting thread and needle
  • masking tape or blue soluble marker or any other marking device that you like
  • a quilting hoop if you prefer to work with one while hand quilting

Alright, I think I have given you enough food for thought in this blog post! I thought this was going to be my shortest Winterberries blog post yet, and here it has turned into one of the longest, but I do hope I have explained my process thoroughly. But don't hesitate to ask questions if something is not clear!

For your convenience I am providing some links to products that I mentioned. Buying through my links doesn't cost you any extra, but does provide me with a small commission, which I am grateful for!

Quilting hoop ( click)

Embroidery needles ( click)

Sulky 12 wt petites ( click)

Water soluble marker ( click)

Quilting stencils ( click)

And now I must get to work so that I can share my quilted quilt top with all of you, before we move onto the final part: the binding!

Until next time~happy creating!

Monique


Tuesday, February 9, 2021

Winterberries part 4 ( February 2021)

 Hello, hello, hello, 

I am back with the next part of our WINTERBERRIES sewalong! 

I hope that you all had an easy time with the appliqued blocks? You might not even have finished those yet if you are choosing to do needle turn applique and that is totally fine! But for those of you who are ready to move on, I am providing the instructions for the setting triangles today so you can move ahead ;).


Alright, we have to make 2 sizes of setting triangles, for the A and the B blocks on our diagram: 


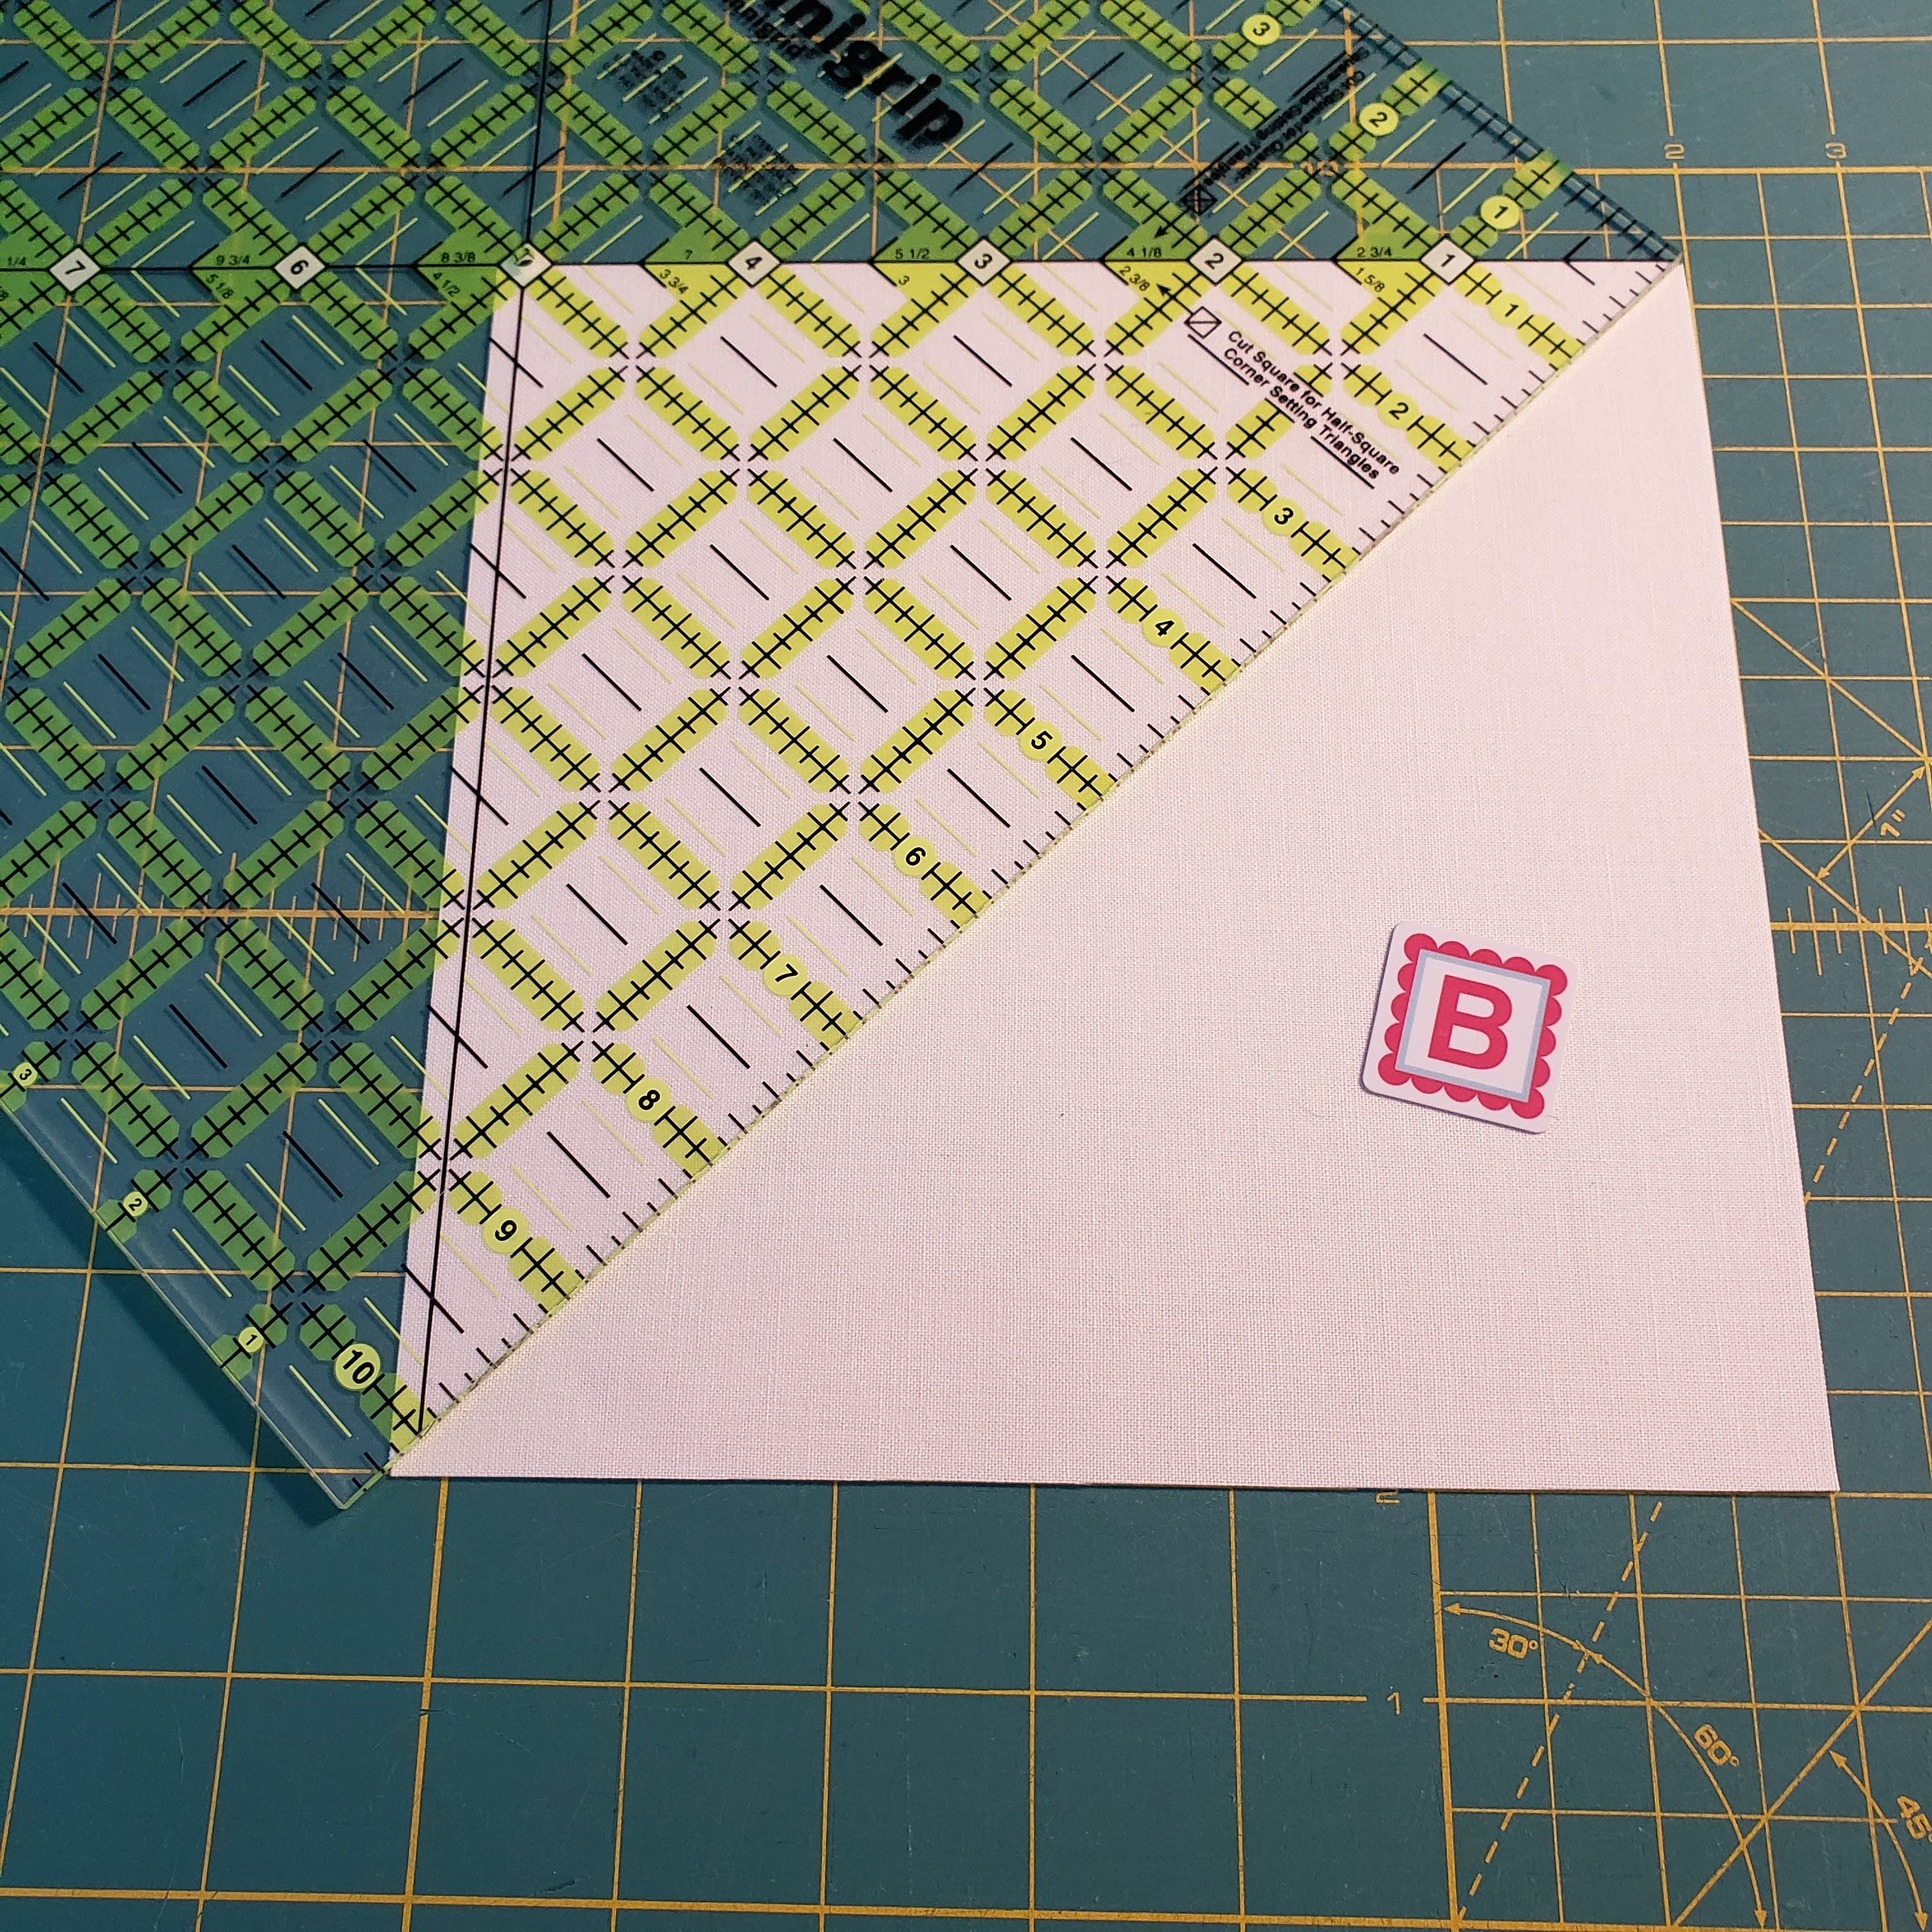
For the A triangles you need to cut 2 squares at 14" from your light fabric. You will cut each square twice, on the diagonal, to end up with 4 triangles, like this:


Do this for both your squares so you end up with 8 A triangles all together.

For the B triangles you will cut 2 squares at 7 1/4 " from your light fabric. Cut each of these squares once on the diagonal, like this: 


You should now have 4 B triangles.

Before you lay out all the pieced and appliqued blocks to assemble your quilt top, press them all carefully and trim them to 9 1/2" ( if your blocks are all smaller than that, trim your blocks to all the same size, because this will make it much easier to assemble your quilt top).

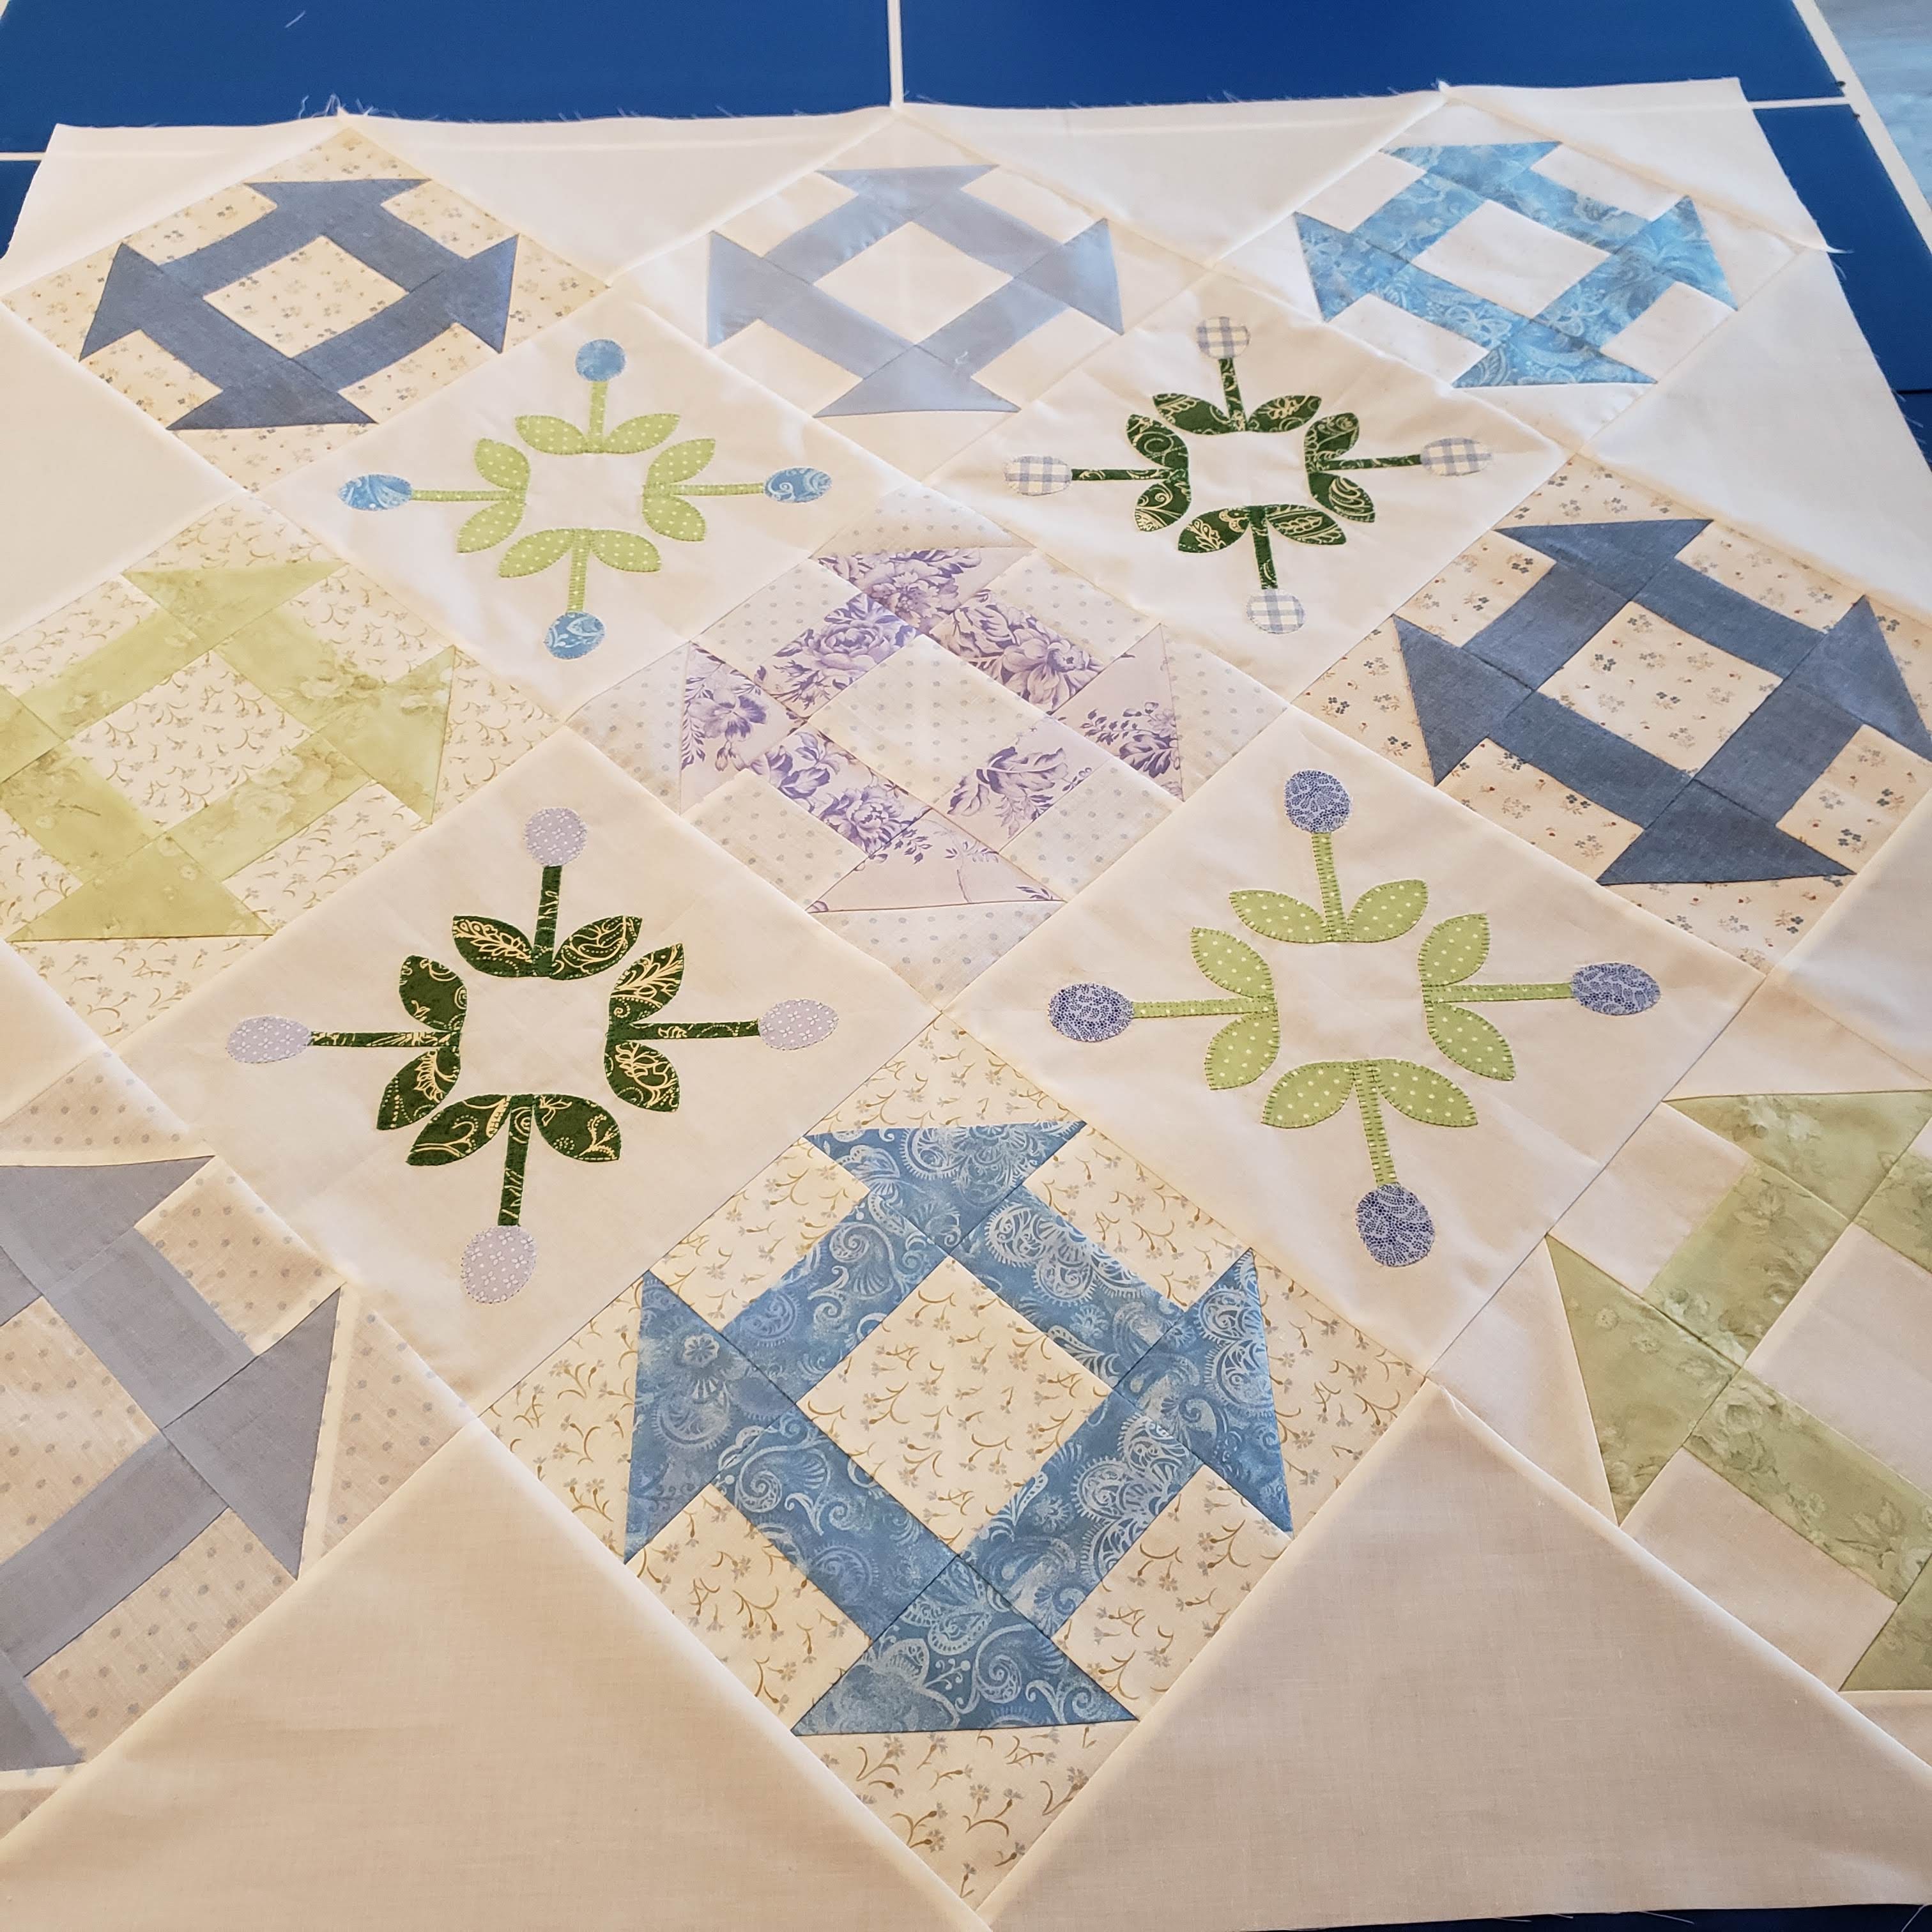
Now lay out all your blocks and triangles according to the diagram:


 I had a hard time getting a photo of the entire quilt top all laid out, but the B triangles are at the 4 corners and the A's are on all 4 sides ( 2 per side).

Now it's time to sew the blocks together and this is easiest to do on the diagonal. Below I have shared the order of how I sewed my blocks together:

Start sewing your blocks and triangles together. Sewing triangles onto squares can get a little tricky so just make sure that your A triangles "tops" line up perfectly with your pieced blocks bottoms. Sound confusing? In the photo below I am about to sew triangle 1 to pieced block 2. Look at where they are matched perfectly. Start pinning there and work your way up and left.

When you get to the other edge you will notice that your triangle is longer. That is the way you want it!

 Now sew these two blocks, press them open and place them back in position so you can pin the next block ( number 3) to number 2. I highly recommend laying back your blocks every time so you can make sure that you don't accidentally sew a triangle the wrong way ( I speak from experience!).

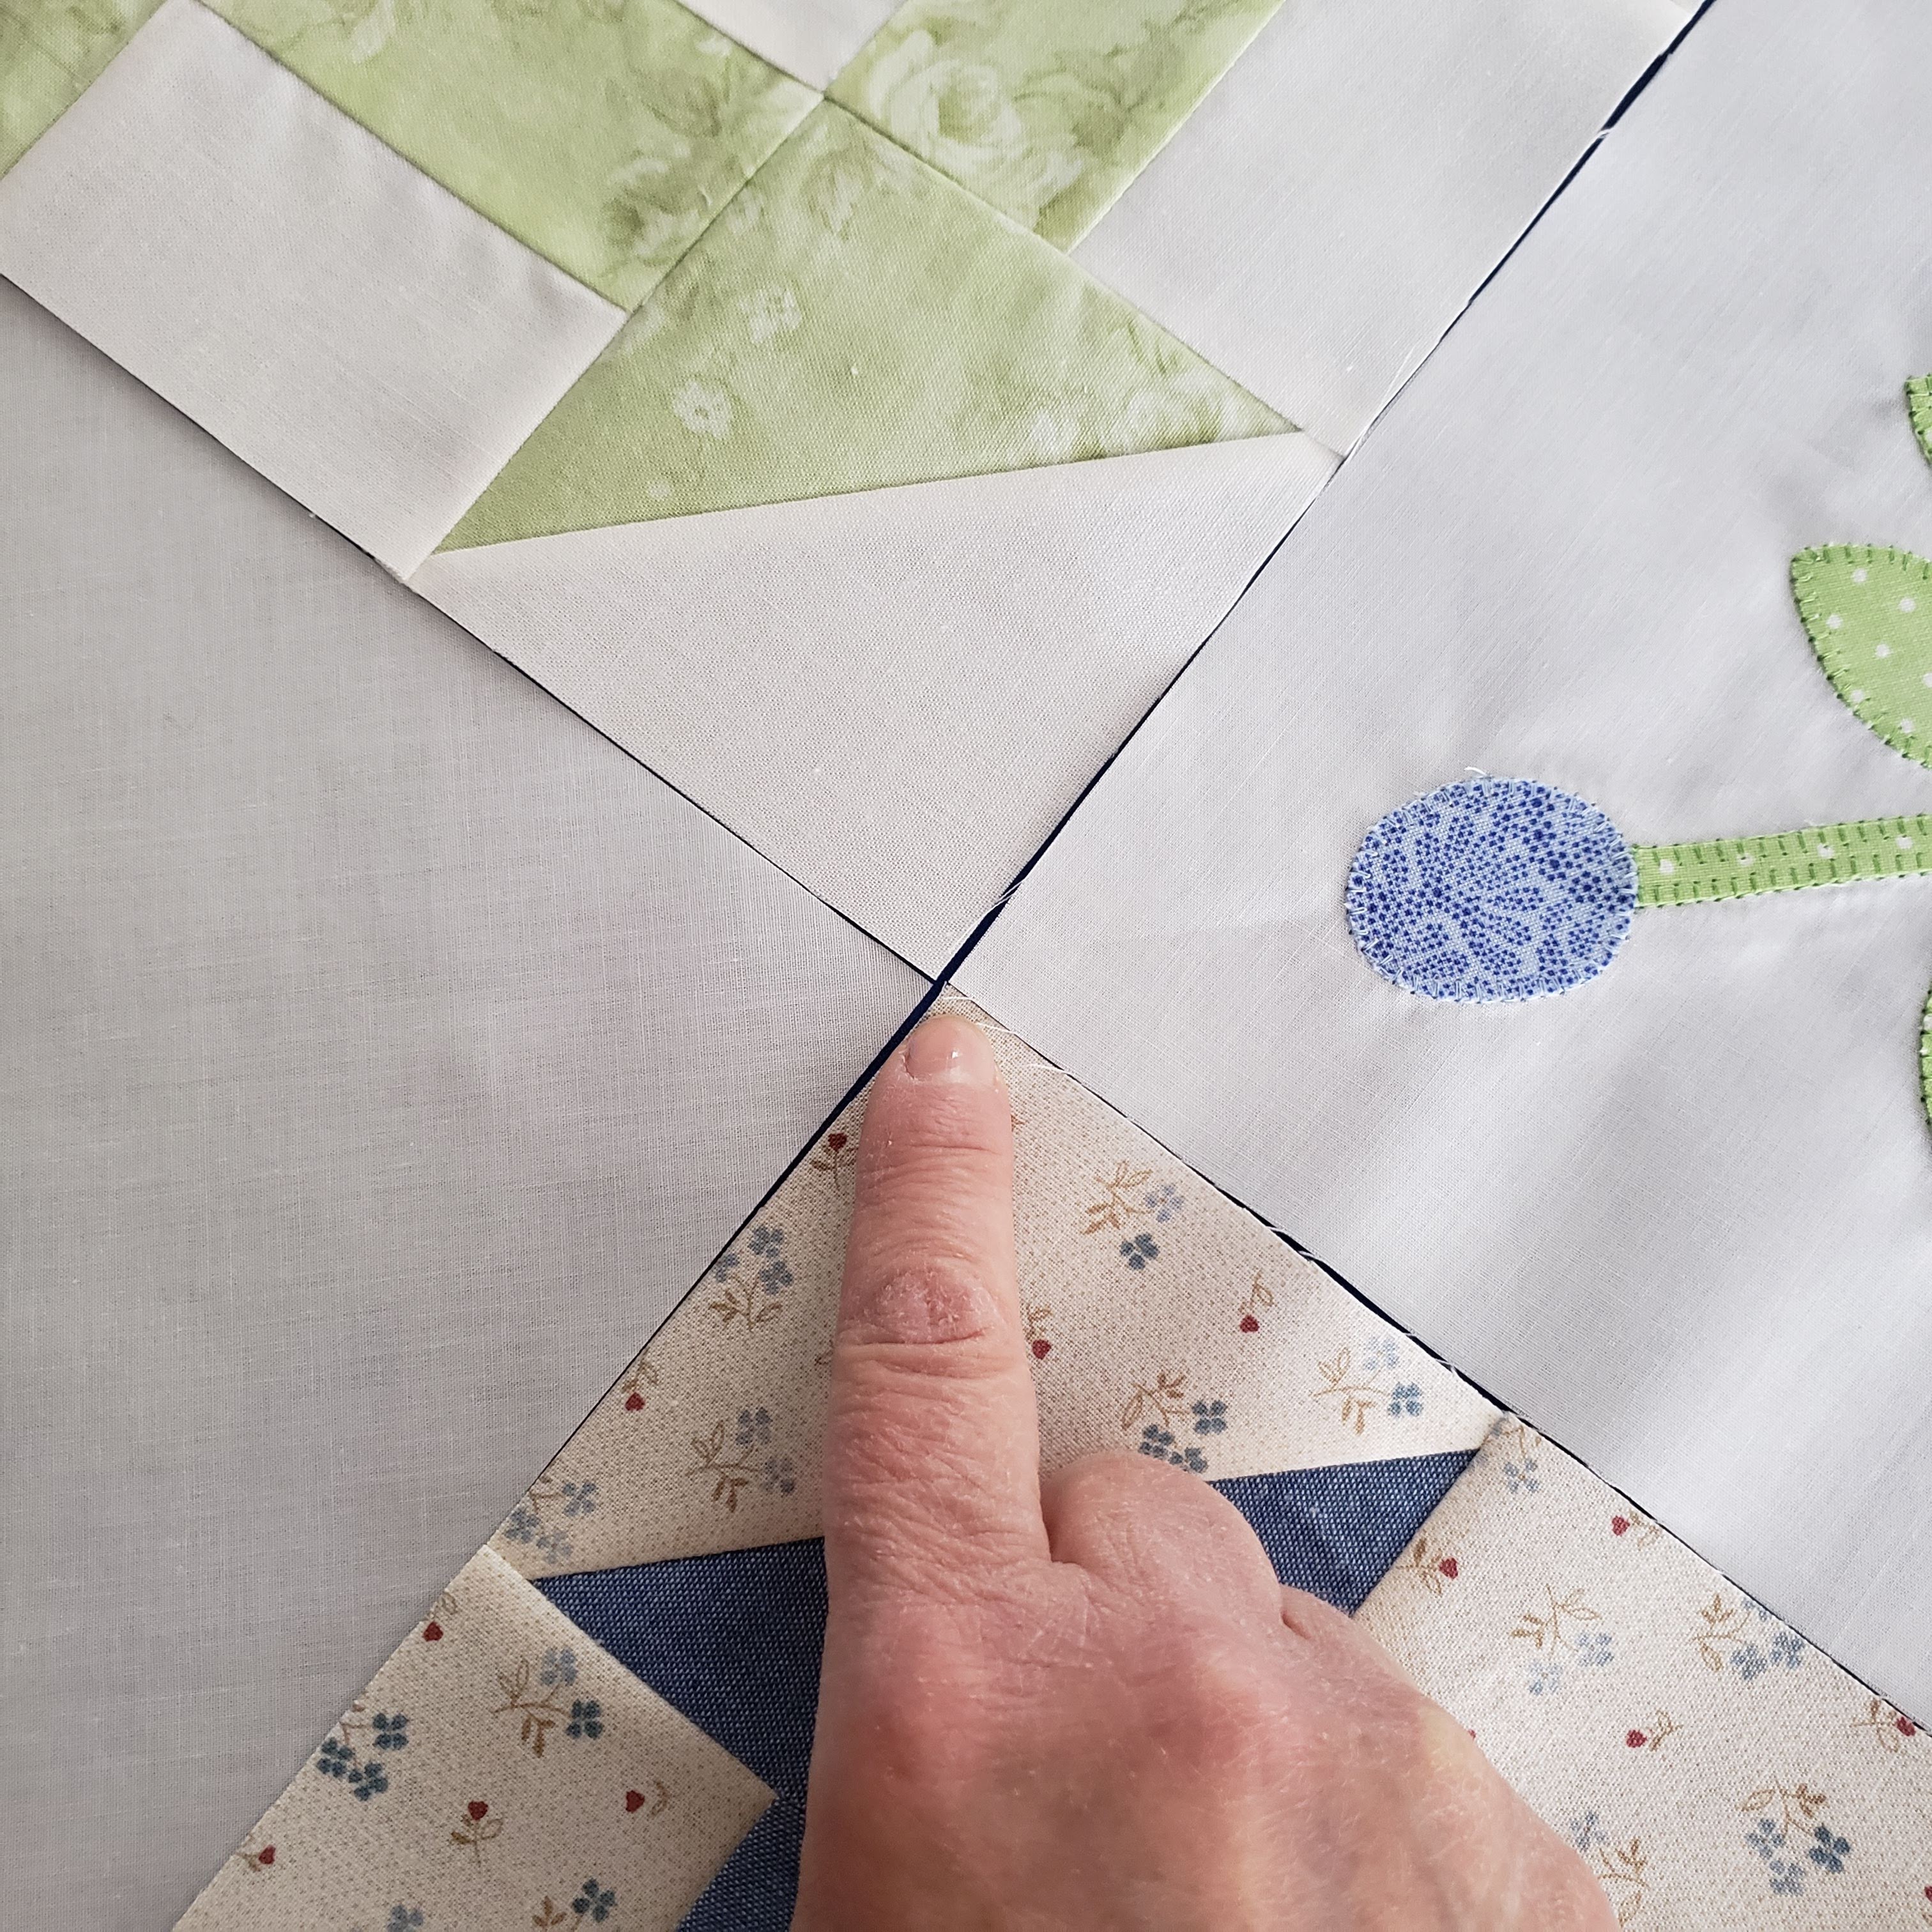
When you have sewn together blocks 1,2, and 3, you can add triangle 4 to the top of block 2. Block 4 ( aka B triangle) is larger than block 2. In order to get that triangle sewn in the correct place, lightly fold it in half to find the center point. Do the same to block 2. Start pinning on this center mark and pin outwards. You should have an additional 1/4" or so on both sides. Perfect! ( Because I forgot to take photos of this, I recreated it with some paper "blocks". )


 Sew these blocks and press. Now move on to the next row and sew that on in a similar manner ( this next row is easier because there are no B triangles to worry about!)

Continue to sew blocks and triangles together row by row until all your rows are complete:
 And then sew your rows together one by one until the entire quilt top is put together. Press the entire top and now you are ready to add batting, backing, and quilting, but we will leave that until next time ;). If anything is not clear, please ask! I am happy to help.

For any of you who are interested in the tools I used in this segment of making the quilt, I am providing these links. The right tools do make a difference and having them just makes your quilting life easier  :).
 
  • To square up my blocks I used this ruler( click).

  • To cut my large 14 inch blocks I used this ruler ( click here for similar).

  • I couldn't live without my large 60mm Olfa  rotary cutter(click). The handle is ergonomically designed and the blade automatically retracts when you let go of the handle, so no chance of accidentally cutting yourself. I have had mine for probably more than 12 years and, with a new blade once in a while, it works as well as the first day I got it.

  • And lastly, my rotary cutter works great together with my large, self healing cutting mat ( click). When I first started quilting I bought a cheaper brand because that is what I could afford, but a good one makes a world of difference. This one is nice and large ( 24 by 36), doesn't slide around, and is just great!
Remember that every purchase you make through one of my links doesn't cost you a penny extra, but it does provide me with a small commission, and for that I thank you!


Until next time~ happy creating!
Monique

Monday, February 1, 2021

Winterberries part 3 ( February 2021)

 ( please click title to view this post in your web browser!)

Hello Winterberries fans!

Today I am back with part 3 of our sewalong. I hope you have all had a chance to sew your Churn Dash blocks together? If not, no worries. Just go to Winterberries part 2 and there you will find all the instructions and measurements for those!

This time we will be making the appliqued blocks. There are only 4 of them so they really shouldn't take too much time.

I chose to do my applique with fusible web, so if you choose to do yours using needle turn applique please make sure to add the appropriate seam allowances around your pieces!

Our blocks are going to look like this: 


It is completely up to you if you want to keep the colors in your appliques all the same or change them up. I was going to use all the same greens in all my blocks but , using scraps, I ran out of one green and so had to use a variety of colors.

For these blocks you will need:

  • 4 squares of light background fabric cut  9.5" square ( you might find it easier to cut your squares slightly larger to allow for "shrinkage" if you are choosing needle turn applique)
  • scraps of greens and blues ( or whatever other color you choose)
  • fusible web
  • sewing machine thread that matches your chosen appliqué fabrics.

To begin with you will print out the applique pattern pieces, which you can find here: https://docs.google.com/document/d/1vA2YwDlnoaV0FzeenhDr8EGLvEYrZeAcsVghiw57gwM/edit?usp=sharing

 Cut the placement circle out. You can choose to use it as is, or make a cardboard template, or even use freezer paper to make it "stick" temporarily to your blocks. ( If this sounds confusing, you will see what I mean in a minute).

Trace the leaf ( 8 times) and berry shapes ( 4 times) onto the fusible web. Apply to your chosen fabric following the manufacturer's instructions and cut out.
 Rather than tracing and cutting individual stems, it is much easier to fuse a rectangle of fusible web to your fabric and then cut the stems with a rotary cutter! 
For each block you are going to need 4 stems, cut at 1/4 by 2.5" , plus 8 leaves, and 4 berries.


Now for the slightly tricky part...
You are going to fold your background fabric as shown in the photos below. These fold lines will give you a perfect guide to where to place your shapes!

Start with your background 9.5" square.

Fold up towards top.
Unfold and fold towards side.

Now you should have 2 fold lines, like this:

Next, you are going to fold your square on the diagonal, in 2 directions, like this:


And voila, your guide lines are ready!


Now please, please, PLEASE remember to place your applique on point! 

Take you placement circle and place it right in the center of your fold lines. Your 4 stems will butt right up to this circle, like this:

( If you choose to do your placement circle out of freezer paper, you can iron it down, use it, and then peel and reuse it on your next block). Fuse your stems down and then move onto the berries and leaves.

My berries are almost 2 inches from the corner of the block to the top of the berry...
And here is a closeup of my leaves...
Do you see how they almost touch that center fold line? You can of course choose to place yours where you like!

And there you have one finished block. Now 3 more to make....

Remember you need to make 4 blocks all together. And then you will need to fasten your shapes down, either by machine or hand. I would recommend using a blanket stitch or zig zag stitch, in colors that match your fabrics. Doing this will serve 2 purposes: Your shapes won't let loose when you wash your quilt AND you will give definition to your appliques. If you find that your fabric wants to pucker as you stitch around your shapes, you can choose to back it with some stabilizer that you can cut away afterwards.

Alright, that is all for this week's instructions! I have to get busy stitching my appliques and then I will share all the rest of the information about the setting squares next time.

Please make sure to ask if anything is not clear! And most importantly, have fun!

Until next time~happy creating!
Monique


Tuesday, January 19, 2021

Winterberries part 2 ( Jan 19, 2021)

 (please click title to view this post in your browser)

Hello everyone, today I am sharing part 2 of the WINTERBERRIES sewalong. To see part 1, click here.

Today I am going to share how to construct the Churn Dash blocks. There are 9 Churn Dash blocks so you will have to repeat the following instructions 9 times in order to make all your blocks.

For EACH block you will need to cut a light strip and a dark strip ( a FQ works great for this!):

Cut your strips at 3 7/8" and cut 2 squares from EACH strip. So you should now have 2 dark and 2 light squares: 


Place one light and one dark square, right sides together, and draw a diagonal line from corner to corner: 

Now draw two more lines, 1/4" away from this center line, like this: 


Pin and sew on those 2 outside lines ( the blue ones in my example). 


Then cut the square apart on the center line. You now have 2 half-square triangles ( or HST's). 


Press your HST's open and square them to 3 1/2".  


Repeat for the other light and dark square. You should now have 4 HST's.

Next, you are going to trim the strips you started with from 3 7/8" to 3 1/2".

From the light strip, cut one 3 1/2" square ( this will be your center ( C in my diagram) and 4~  2" by 3 1/2" rectangles (  #2 in my diagram).

From the dark strip cut just 4~ 2" by 3 1/2" rectangles. ( # 1 in my diagram)

Lay out your pieces like this: 


And sew them together in the order you prefer. I like to sew my rectangles ( # 1 and 2)together first... 


and then sew in rows, like this: 


Finish sewing your block together and square it to 9 1/2". 

Repeat this process 8 more times for a total of  9 Churn Dash blocks. Easy-peasy, right?


If you have any questions or something is not clear, please ask!
Next time I will share how to make the appliqued blocks. In the meanwhile, have fun with these, no rush, I promised you a S L O W sewalong and that is exactly what we are going to do ;)

Monique