a blog about my quilting life...mostly

a blog about my quilting life...mostly
Showing posts with label February 2022 sewalong. Show all posts

Friday, February 25, 2022

Hello? Spring? Where did you go?

 Hello again, 

Remember when I wrote last week that Spring was looming just around the corner? Well, I was WRONG! Today we woke up to a  layer of fresh SNOW and ICE... I guess I should look on the bright side and be happy that the puppies will not be tracking in any MUD today ;).

We are in the last week of the February sewalong and today's instructions are super simple:  Finish up your quilt, if you haven't done so already. 

To finish up my quilt,  I quilted it in loopsy-doopsies ( not a professional term, but that is what I call these) , using my free-motion foot and lowered feed dogs. 

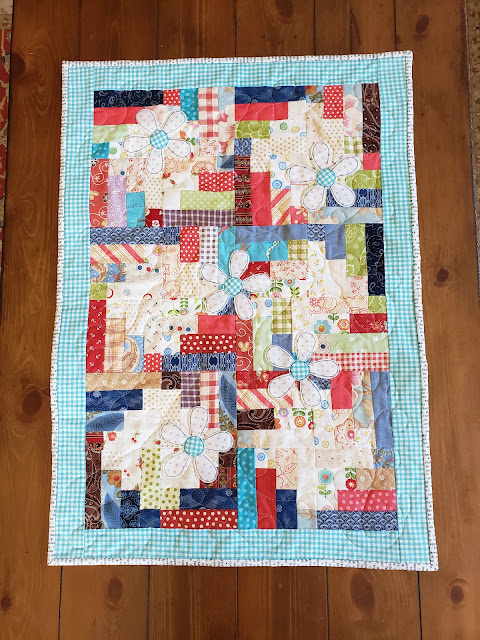
I also free-motioned around my daisies to make them stand out a bit more. You can see the design way better on the back of the quilt! 
Looks almost professional, doesn't it? :)

Here is another look:


By the way, how cute is that backing fabric with the names of quilt shops all over??

Next, I squared it up ( here is a link to a tutorial on how to do this: https://tinyurl.com/mr3k4fu4) , and  then made binding.

I like to cut my binding 2.5 inches wide, but others like to go skinnier. You choose what you prefer. Here is a great tutorial on how to make continuous binding: https://www.farmandfolk.com/blog/2019/11/13/quilt-binding-tutorial.

For my binding I found this great print that had all kinds of farmhouse words....perfect, don't you agree?

When I finished hand sewing my binding to the back, I made a label and attached that ( I know! Don't fall off your seats now!).
Labels are really easy to do and it is just plain laziness on my part that I don't add labels to my quilts more often. You can buy premade labels, you can use iron on transfers to make labels, or you can print your text off on a computer, trace it onto some muslin with a permanent marker, add a border and sew it down ( that last one is usually my choice). Here is a quick and easy tutorial for a label: https://www.diaryofaquilter.com/labeling-your-quilt/.

Here is the information I included on my label: 

And there you have it, all done!
 

I hope you have enjoyed sewing along and I encourage you to share your results with me, either in the FB group ( you can find me here: https://www.facebook.com/groups/1790902080964624), or via email ( link is under the Contact Me tab in the sidebar or by clicking here: https://myfarmhousequilts.blogspot.com/p/contact-me-hi-there-if-you-would-like.html ) because I always LOVE seeing the different interpretations of a pattern!

Take care, and until next time~happy creating!
Monique

Wednesday, February 16, 2022

Yay for some Spring Feels...and part 3 of the sewalong

  { my posts may contain affiliate links, which don't cost you one extra penny, but support my blog and group....thanks for supporting my time and efforts in this small way!}


Hello friends, 

Even though we are still dealing with some snowbanks and chilly temps here in central Pennsylvania, every once in a while there is a nice sunshiny, warmish day, which promises the impending arrival of Spring. I can just smell it already, can you? I have to admit that I have been eyeing the ground around our Maple trees, where hubby and I planted a large number of bulbs last Fall, hoping to spy those first little pointy green bits, but nothing so far. But I am convinced that our ornamental pear tree and dogwood trees have buds! And in our garage we already have the wood for the new garden beds that hubby will build me, in a sunnier spot in our backyard this time around, just as soon as the ground thaws and we can install them without slipping and sliding in the mud. I am ready for Spring! How about you?

( image via Pixabay)

Of course the great thing about Winter weather is that I have a perfect excuse to hibernate inside and work on quilty stuff, and that is what I have been doing...

Here are some photos of projects I am working/have worked on these last few weeks. ( If you want any more information on any of these projects, use the arrows at the bottom of the post to scroll back through previous posts and you will find them all there).

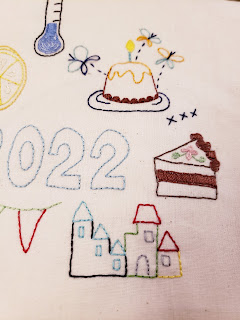
(Journaling 2022 with embroidery)


                            ( Happy Villages quilts)


( baby quilt~another option from the sewalong)

                               ( Christmas quilt)


                              ( red and white quilt)


               ( Basket quilt blocks from an Edyta Sitar pattern)
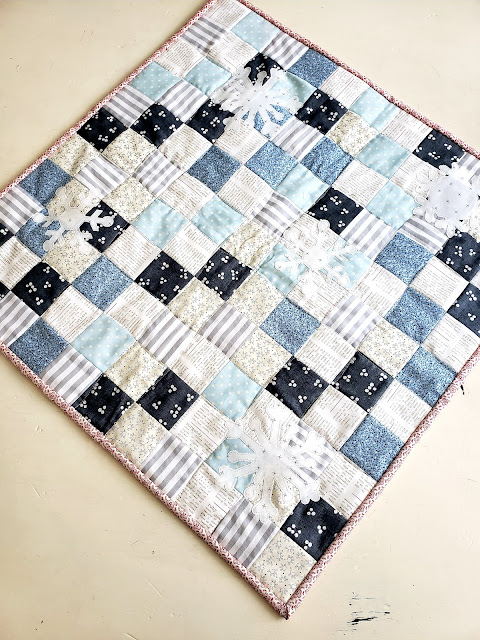
( winter quilt using Accuquilt dies)

And then of course there is our February sewalong, which is almost at it's end ( although if you want to join in it is not too late...just check out the previous 2 blog posts here and here for all the information!).
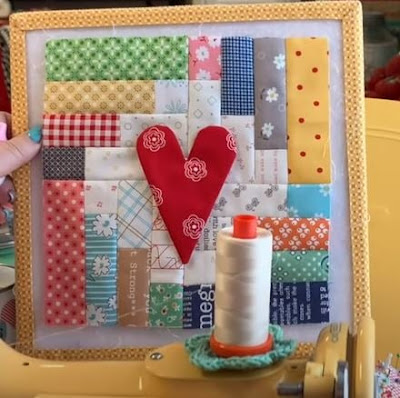
I decided to make just 6 blocks at 8.5 inches big  to make a little table runner. In the original design, Lori Holt appliqued hearts to the centers of all her blocks: 

( image via Lori Holt)

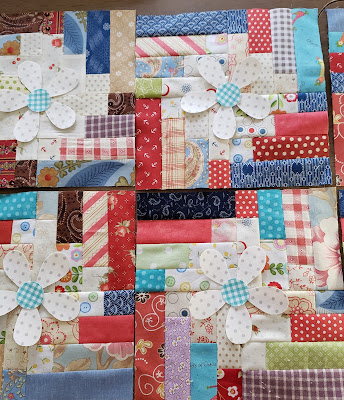
 I didn't want to use hearts on mine because the hearts would be facing upside down when used as a table runner, depending on orientation, so I decided to use Daisies instead. 


 But when I laid out the daisies on each block I didn't like them so decided to scatter them all over the quilt, rather than one per block, more like this:

I think it is very important to play around with various aspects of your quilt, until it gives you a happy feeling! You have several options for your applique ( if you choose to do any that is!). You can use fusible web like I did, or you can use needleturn applique. If you don't care for needleturn, there is another great method, where you sew two ( simple!) shapes together RST, then cut a slit in one, turn the entire shape right side out, and then sew down by hand or machine. I really enjoy that method, but  the daisy shape would not be the easiest shape to do that with, and fusible web is so much faster!

For those of you who are new to quilting and/or fusible web, here is a quick little tutorial: 

Start by tracing your shapes onto the paper side of the fusible ( I like using this brand ( click). 

Next, cut out your shapes very roughly and lay them on the BACK of your chosen fabric. 

Following the manufacturer's instructions, fuse your shapes to your fabric, let cool, and then cut those shapes out exactly on the lines. 

Then fuse your shapes to the front of your blocks, again, following the instructions provided by the manufacturer. You will need to sew your appliques down because they won't stand up very well to washing without that little step. If you are not planning on washing your project, you might be able to get away with no sewing, but I can't guarantee it will never let loose... I will recommend that you add appliques to EACH block before sewing your blocks together ( especially if you are making a BIG quilt) because it will be so much easier to work per block, rather than with the entire quilt! ( on mine that obviously wasn't doable because some of my daisies went on the seams of blocks, but my quilt is small and still easily maneuverable).

After I fused my daisies, I needed to decide how to fasten them down...and again, had to decide what would make ME happy...and that was "sketching" around each petal and the center with black thread to really make those daisies stand out on that very busy background. 


Can you see what a HUGE difference it makes when you do that? I am now happily stitching around each daisy with black thread! Some other options are to use a blanket stitch or zig zag, or whatever fancy stitch your machine has. By the way, in case you need to have that daisy shape, it is from a set of templates by Lori Holt called Prim, which you can find by clicking here ( click).

After you add your applique ( or not), sew your blocks together, add a border ( or not), layer, and quilt your work. Because of the many, many seams in these blocks I am going to suggest machine quilting, but again, YOUR quilt, YOUR decision :). 
Next week I am hoping to share my finished quilt, and am hoping to see some of your works in progress as well, either in the FB group, or you can send me an email ( the contact information is in the sidebar~don't see a sidebar? Make sure you are viewing this post in a browser window by clicking on the title).

So to sum up this week's sew along instructions:
Continue sewing your blocks
Add applique
Sew your quilt top together ....
And if you get this far, go ahead and...
Layer and quilt your quilt
Bind
Add a label ;)

And before I sign off, could I ask you to do me a favor?  Leave a comment right here on this post so that I can see if comments are now working. Thanks so much!

Until next time~ happy creating!
Monique

Thursday, February 10, 2022

February sewalong part 2 ....and a finished project....and a new project( you HAVE to see this one!)

( my post contains affiliate links: Please see my disclosure in the sidebar)


 Hello again, 

I'm back with part 2 of our February sewalong, plus some other fun projects that I want to share with you today! Aren't we so lucky to have this amazing hobby/ obsession with this quilting craft? Every morning I wake up and consider what I might work on that day, and that brings me so much joy...oh, the possibilities a fresh new day brings ;).

Alright, let's jump right into part 2 of our sewalong ( if you missed the first part you can read about that here (click).

You have cut all your pieces and are ready to start sewing your blocks together. I found it SO much easier to lay the dark and light fabrics that needed sewing together NEXT to each other, like this: 

Remember that all our "logs" need to measure 4.5" after we have sewn them together, so if you have one that sticks out like a sore thumb you will know that it was sewn to the wrong "partner"! 

You can of course sew these chain-piece style, but I chose to do mine block by block so I could control the colors a bit. 

I used my wool mat ( click) to organize my pieces and laid that next to my sewing machine and then sewed the logs for each block together, like this: 
It is pretty easy to mess up and sew the wrong logs together, ( ask me how I know!) so laying them next to each other in a STAIR STEP way is a great way to keep them organized. Press your blocks.

Pressing your seams open makes it easier to sew your seams later, but do what you prefer. Now is the time to square up each block to 4.5"! If you do it now, you will have a much better chance of having a true-sized 8.5" block when you are done. And don't worry if your blocks are off....as long as they are all off the same amount you will be just fine! I love using my rotating cutting mat ( click) and Cute Cuts Trim it Square ruler ( click) for this purpose. So quick and easy! In fact, I own all the sizes up to 10.5 and they come in super handy for squaring up my blocks in all kinds of projects ( because, you know, my blocks are rarely square :P ).


After squaring up the 4 4.5" blocks, I  sewed my block together, like this: 

CAUTION: Pay very careful attention to how you orient your blocks here! Each block  is rotated once as you go clockwise around so that the long log ends up on the outside so please make sure you do just that! I found it easiest to grab my 4 blocks and lay them all the same direction, and then twisted and turned from there. Once I had made one block correctly, I kept that one in front of me, just to make sure I would orient all my blocks the same way.

Trim your block to 8.5" square. Go on and make as many blocks as you need/want for your project. I think that 3 by 6 blocks would make a nice table runner, and 3 by 3 would make a great small wallhanging. Obviously the bigger project you are planning, the more blocks you will need.

For those of you who decided you want to use 2.5" logs instead and make a 12.5" block, the instructions are pretty much the same. Lay your fabric pieces that will make a completed 6.5" log next to each other and sew them together block by block, BUT remember you only need 3 logs total for each block! 


Trim your blocks to 6.5" and them twist them to make a 12.5" block, with all long logs to the outside, the same way as explained in the smaller block above. 
 
Easy-peasy, don't you think? But if anything is not completely clear, please ask! 
As I told you last week, these blocks made with the 2.5 " strips come together very quickly and easily and I was able to make this baby blanket super quickly! Rather than adding appliques in the centers of all the blocks, I added one really soft and cuddly cow applique in one corner. Some quick machine quilting, binding, and one label later, I had completed my sweet baby quilt, and in plenty of time before baby's arrival! 

I definitely see more of these quilts in my future!
Alright, so for this coming week you can start sewing your blocks and next week I'll share some ideas and templates for appliques you could use in the center of your blocks.

But before I go I want to share a new project that completely captured my attention this past week:
My online quilt guild, Meander, had a guest teacher named Karen Eckmeier, who is famous for her Accidental Landscapes and Happy Villages quilts. Well, I watched her class on the Happy Villages and fell completely in love with Karen and her fun method of making these quilts, so I just had to start a village of my own! Here are some photos of my progress:  


I am now in the process of free-motion quilting over tulle around each of the shapes and that will take some time, but I will share the finished project sometime soon! And I will definitely be making more of these quilts! You can find out more about Karen here ( click).

Talk to you next week~happy creating!
Monique

Thursday, February 3, 2022

February Sewalong...and a kitchen update

 Hello friends, 

I am back with the first set of instructions for our sewalong! This really is a super simple sewalong and once I explain how to sew your blocks you are going to be able to just run and go, making however many blocks you want for your project. So this week I will just share the cutting instructions and how you might want to organize your fabrics, and then next week I will share the sewing instructions. After that you are going to be able to just make as many blocks as you need and then I will share one final post with some updates and maybe some hints. So this sewalong should be pretty much wrapped up by the end of February! Today I am also going to share an alternate block and I think it is so sweet and versatile!

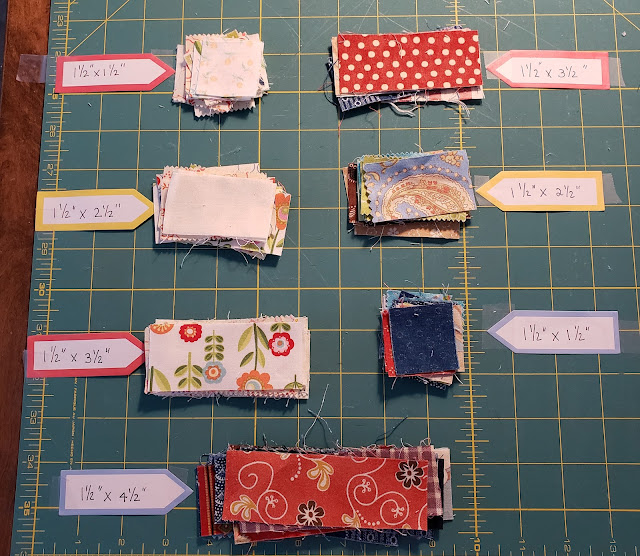
Alright, let's get started. These are the cutting instructions for the 1st option: 

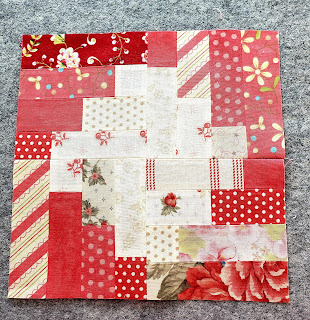
The block we are making consists of 4 smaller blocks, each 4.5" unfinished, which you will sew into an 8.5" unfinished block. That will end up looking something like this block:


So grab your fabric 1.5" fabric scraps and cut the following: 


You will need a light and dark 1.5" square;

a light and dark rectangle 1.5 by 2.5" ;

a light and dark rectangle 1.5 by 3.5";

and a dark rectangle 1.5 by 4.5".

Each of the little blocks requires 7 pieces total, 3 that are light, and 4 that are dark.

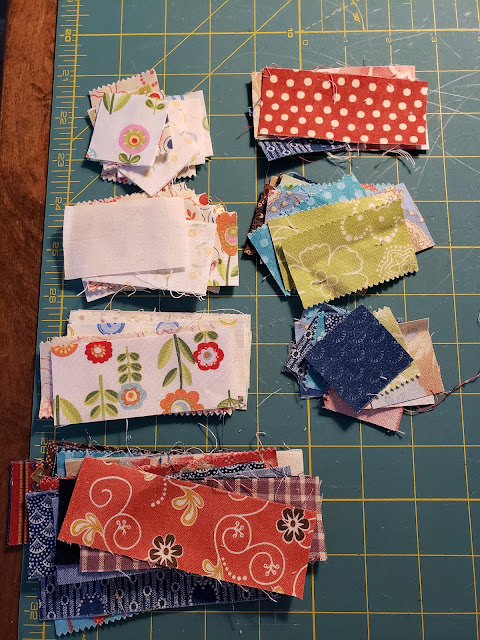
I found it very helpful to lay my pieces out the way I show in the photo above because those are the sizes that are going to get sewn together, but for this week you can just go ahead and cut your fabrics and then next week when we sew you can organize them like this.

As I shared last week,  you can really make your blocks looks different depending on your fabric choices....

Darks ( reds, blues, and browns): 


Reds and pinks: 

Brights:  

The possibilities are endless! 

Now, if you are not into sewing 1.5" strips because those are too finicky for your liking, or maybe you don't have a stash of 1.5" strips, I have another option for you! I happen to have 2 buckets full of 2.5" strips, leftover from other projects, and I thought it would be fun to try making a variation of this block using that size strips. And I have to tell you that I LOVED making these blocks!
Using 2.5" strips, I made the following block: Option #2:

So it looks a lot like the original block, with a slight variation. The great thing about using 2.5" blocks is that the 4 blocks are 6.5" unfinished, thus making a 12.5" final block. 12.5" blocks make for a real quick quilt! I am finishing up a baby quilt using these blocks and it took hardly any time at all! 
Isn't it bright and happy? I just love it! And just imagine what it would look like in different fabrics and colors! I am already planning on making a fun Spring table runner with some pinks and yellows using this block!

If you would like to go this route, you will need to cut the following pieces for each 6.5" block:
One dark square 2.5";
One light and one dark rectangle at 2.5 by 3.5" ;
One light rectangle 2.5 by 4.5";
One dark rectangle 2.5 by 6.5".
Each one of the 6.5" blocks requires 5 strips~ 3 dark and 2 light.

If you are not sure which size block you want to make, why not try both and see which one you like best?

Now remember that in Lori Holt's example, she adds a heart applique to the center of the blocks. 

You can of course do that too, or you can add a different appliqué ( how about green and white blocks with a shamrock applique or bright and light blocks appliqued with daisies?) or you can omit the applique all together, which is what I opted to do in my baby quilt. So think about this a little bit before you make your fabric choices!

So this coming week, your "homework" is to pick out your fabrics and cut them the correct sizes. Next week I will share how I laid out my pieces and some general hints and tips about the construction.

This blog post is already pretty long, but for those of you who have been following along with our kitchen reno, we got our paint and were able to put (many more) layers of the final top coat on the cabinets and install the new hardware. 

And just for fun I will include some "before" pictures of the kitchen when we bought the house: 


And here are the "afters": 


Almost unrecognizable, isn't it? And now we are waiting on new countertops and a new (white!!) sink to get installed later in February. I am SO excited :D.

If you are still here reading until the very end, thank you for indulging me!
Until next time~happy creating!
Monique