Hello friends,
Today is finally the day that I can reveal the secret project that I have been working on for Fat Quarter Shop!
{Disclosure: My post contains affiliate links, which earn me a few pennies if you click and buy something through those. There is absolutely NO additional cost to you when you buy through one of my links}
I have been teasing you with glimpses of my fabric selection, but wasn't allowed to show the pattern or the blocks or the quilt, until given the green light by Fat Quarter Shop....
....but now that day has finally arrived~ YAHOO!
First, I will reveal that the name of the pattern is Ribbon Border and it is from the Classic & Vintage Quilt Series that Fat Quarter Shop has put together. You can see all the patterns from this collection by clicking HERE ( click). There are so many fun patterns to choose from, and all at a really reasonable cost. I am not sure if they all do, but the pattern we were given has 4 different size options, which makes the pattern so very versatile!
Here is a peek at the original pattern that we were given:

So, without further ado, here she is, MY version of Ribbon Border!
.jpg)
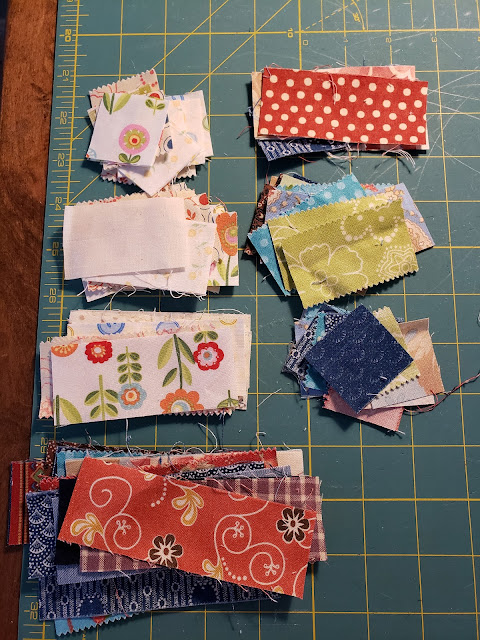
As I shared before, the fabric is called SUNWASHED and it was designed by Corey Yoder. I knew when I saw the pattern that I wanted to use some happy, summery fabrics, although I have seen the other makers' fabric choices, and they are all great looking, so I don't think you can really go wrong with any color/fabric choices!
.jpg)
If you would like to check out the SUNWASHED collection, you can do so by clicking HERE( click).
This quilt top was pretty simple to put together, and didn't take much time, especially because I chain-pieced!
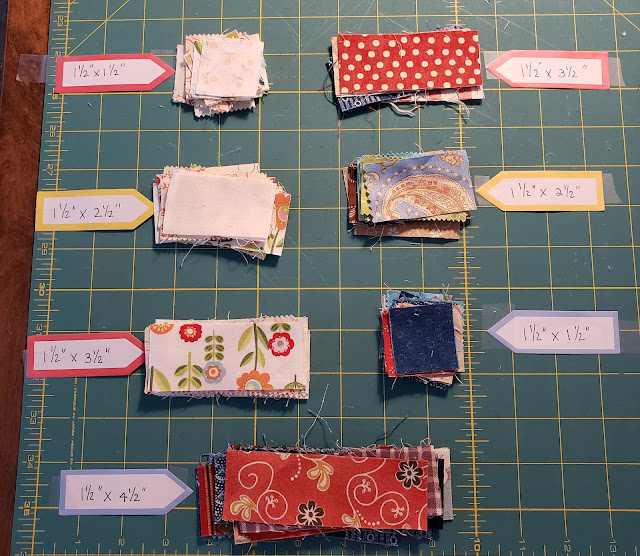
Obviously the big squares are super simple, and the other blocks are constructed in 2 seperate halves that are then sewn together. I would say the only tricky part of those blocks is that they are 1) cut on the bias, so more stretchy, and 2) they are sewn from the point, and we all know how sewing machines love to "eat" those points when we first start to sew!

- Because of the bias edges, fabric pieces will stretch more easily~ use starch and pins to keep shapes looking proper.
- Trim up each and every block after construction to keep them true to size.
- Trim dog ears.
- Start sewing on a LEADER ( or scrap piece) of fabric, which you can feed through the machine at a straight angle, rather than a pointy corner, which has a tendency to be pulled into the throatplate.
- Lay out your left and right block components as you piece them~ they look very similar and it is easy to place a piece the wrong direction!
.jpg)