Hello friends,
I am back with the first set of instructions for our sewalong! This really is a super simple sewalong and once I explain how to sew your blocks you are going to be able to just run and go, making however many blocks you want for your project. So this week I will just share the cutting instructions and how you might want to organize your fabrics, and then next week I will share the sewing instructions. After that you are going to be able to just make as many blocks as you need and then I will share one final post with some updates and maybe some hints. So this sewalong should be pretty much wrapped up by the end of February! Today I am also going to share an alternate block and I think it is so sweet and versatile!
Alright, let's get started. These are the cutting instructions for the 1st option:
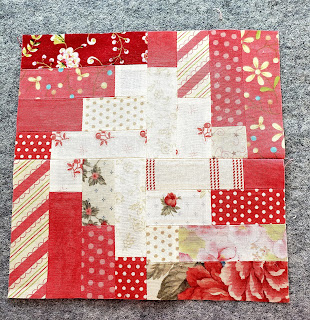
The block we are making consists of 4 smaller blocks, each 4.5" unfinished, which you will sew into an 8.5" unfinished block. That will end up looking something like this block:
So grab your fabric 1.5" fabric scraps and cut the following:
You will need a light and dark 1.5" square;
a light and dark rectangle 1.5 by 2.5" ;
a light and dark rectangle 1.5 by 3.5";
and a dark rectangle 1.5 by 4.5".
Each of the little blocks requires 7 pieces total, 3 that are light, and 4 that are dark.
I found it very helpful to lay my pieces out the way I show in the photo above because those are the sizes that are going to get sewn together, but for this week you can just go ahead and cut your fabrics and then next week when we sew you can organize them like this.
As I shared last week, you can really make your blocks looks different depending on your fabric choices....
Darks ( reds, blues, and browns):
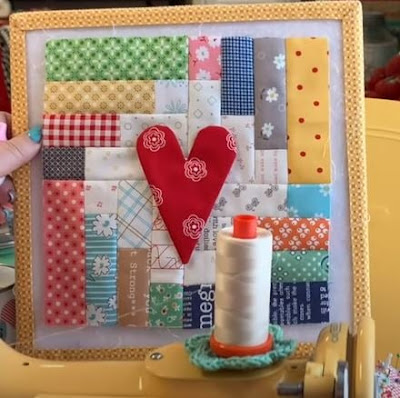
So it looks a lot like the original block, with a slight variation. The great thing about using 2.5" blocks is that the 4 blocks are 6.5" unfinished, thus making a 12.5" final block. 12.5" blocks make for a real quick quilt! I am finishing up a baby quilt using these blocks and it took hardly any time at all! Isn't it bright and happy? I just love it! And just imagine what it would look like in different fabrics and colors! I am already planning on making a fun Spring table runner with some pinks and yellows using this block!
You can of course do that too, or you can add a different appliqué ( how about green and white blocks with a shamrock applique or bright and light blocks appliqued with daisies?) or you can omit the applique all together, which is what I opted to do in my baby quilt. So think about this a little bit before you make your fabric choices!
And here are the "afters":


Love the changes! The green cabinets are wonderful. We painted our kitchen walls green - but not quite that “bright” or yellow - more of a dark sage I guess. Our trees and roofs are all dripping this morning after our ice storm yesterday. Below freezing again tonight so hope it dries up before then!
ReplyDeleteThanks! Your kitchen walls sound wonderful too. Yes, we are dealing with icy conditions as well...makes it fun to watch the dogs run around :)
DeleteThank you for the wonderful sew along! I am thinking a patriot red white and blue with an applique star. Love your pictures of the remodel kitchen.
ReplyDeleteThank you for all you do for us, Julie Ross
That sounds like a great plan, Julie! I look forward to seeing the final result in the FB group :).
Delete