Happy June, everyone!
Time for block 4 in our Qube sewalong already! Almost halfway through because we are sewing 9 blocks all together ( but if you choose to do more that is totally fine!).
This month's block is such a pretty one ( but I think I said that about last month's block too ;) ).
It is called Mosaic No.15 and here she is:
When I first glanced at this block I thought it was made with just Half Square triangles, but on closer inspection I realized it used both half AND quarter square triangles, plus the square on point~ so a perfect block to build on the previous months' tutorials!
Ready to get started? Here are the dies you are going to need for this block ( and remember, ALL Qubes have exactly the SAME shapes, but they vary in size, so you can make this block with ANY size Qube you own!)
DIES NEEDED:
SHAPE 4 ~ Quarter Square Triangle~ need 4 of each in 2 different colors for 8 QSTs in total. ( big white and big floral triangles in my block above)
SHAPE 5~ Half Square Triangle~ need 4 of each in 3 different colors for 12 HSTs total. ( small brown, white, and pink floral triangles in my sample)
SHAPE 6~ Square on Point~ need 1 ( blue floral in my example)
*Don't let the QSTs and HSTs confuse you...when I first looked at this block I assumed the QSTs would be the smaller triangles, and the HSTs would be the bigger ones...WRONG! So just trust the process ;).
*by the way, if you would like to download this free pattern from the Accuquilt website, here is a link for you: Mosaic #15( click)- page 71 and 72.
These are the Accuquilt directions for their block/color choices:
You can ofcourse choose to use as many different fabrics as you like!
Just a few really important things to remember while cutting your fabric: - place your fabric on your die in line with the cutting blades, NOT the die edge.
- make sure your selvedge ( tighly woven edge) goes under the roller sideways, with the sticker on the die facing out to the side
if you need multiples of a certain shape you can fold your fabric double ( up to 6 layers of fabric are fine)
in the same vein, if you are using a small Qube, you might find you are cutting more than you need for this block, so just reduce the size of your rough cut fabric, like I had to do while making my 4" block.
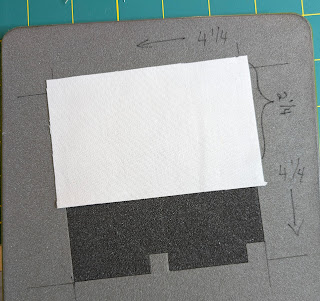
You might wonder about the measurements written on my dies. They show me at a glance what size I need to rough cut my fabric. Your measurements will probably be different, depending on what size Qube you are using.
When you have cut 21 pieces of fabric you are ready to begin assembling your block:
I like to lay out my pieces in the correct spot. The block won't fit together quite right because of the seam allowances, but it really helps to keep all your pieces organized so you know what you are sewing next.
For this block you are going to start by sewing together the center square and the upper left and lower right ( in my sample BLUE) triangles. Press away from center or press open~ you choose. On the one hand it is nice to have opposing seams to "nest", but on the other hand that intersection gets a little bulky and it might lay flatter if seams are open.
Next, sew together the remaining large triangles ( blue and white on my block) on the upper right and lower left. Press towards the darker fabric. Then sew these units to the center square unit.
Now it is time to sew together the 8 smaller triangles on the outer corners to make the corner squares. I pressed towards the darker fabric. You will make 4 of these.
And finally, you are going to sew your flying geese units together.
The flat edges of your triangles should line up, and at the tip ( on the right in my photo) you will see a little peak. Sew a perfect 1/4" seam and then repeat on the other side. Press towards the dark side.
All the components of your block are now ready to be sewn together!
Sew your corner squares to your geese ( I pressed mine towards the outer squares, but you can choose to press open.
Next, you are going to sew the top and bottom to the center of your block.There are a few seams to match up, but nothing to guide you in the center, where the tip of the square on point should meet the tip of the geese. Pin carefully at those points, remembering that you want to sew right on that previously sewn line in order to not lose your points!
And if you find you have extra fullness, just pin the heck out of it!
I found it really tricky to make my points come together perfectly, but it might help you if you stick a pin right under the tip, straight through to the other side ( make sure it comes out in the correct spot on the underside too) and then pinning everything in place.
As you can see, my points are not meeting perfectly, but they are good enough for me and I despise using my seam ripper, so I won't! And hey, at least I have points ;)
So that is Mosaic #15! So pretty, right? And here is how it looks together with my previous months' blocks:
As you know, I am sewing my blocks with a 12" ( seen above) and 4" Qube. It is pretty fun to see these little blocks form so perfectly, something that I never would have accomplished ( or even attempted!) with a rotary cutter!And just imagine how much fun this block would be made with the 16" Qube....you would have a bed-sized quilt in no time! If you want to check out some of the other Qube sizes you can click HERE (click). { if you buy something through one of my links, I receive a small commission, at no extra cost to you}.
Here is my 4" block all done:
And here are all my 4" blocks so far:
And finally, my 12" and 4" block, side by side:
Aren't they sweet?
Good luck making your block(s), and please do not hesitate to ask questions if something is unclear. I worked on these blocks and this blog post for many, many hours in a row, and my brain has turned to mush, so I might have written words that make sense to me, but not to anyone else. ;)
Happy sewing, and see you back here next month!


Love this block. So cute and really like it when I can see the difference in block sizes. Appreciate all you do for us. So thank you.
ReplyDeleteOff to cutting
thank you so much! Please share your block in the FB group ( if you are part of that). I would love to see it.
Delete